Pop culture patterns and more

Thursday, January 9, 2014

Technical Thursday: Hints on reading a pattern

Hello hookers!

Hopefully we're all warming back up by the time this posts, it's really cold today!(Yes, I try to get this written a bit a head of time ;) )

Today, I thought we'd go over some basics and helpful hints on how to read a print pattern. Some people can watch videos and do it, I'm not one of them. I have trouble with charted patterns, but I can, and do, read printed patterns on a daily basis.

So today, we'll be using a pattern by Crochet by Jennifer called Adult Chunky Slippers- download the entire pattern here, on ravelry.com. Visit Jen at http://www.crochetbyjennifer.com to see all of her most awesome patterns.

First, you need to decide if you want to try a pattern. Look at the difficulty level(easy). Do you have the suggested hook size(K), and the suggested yarn(Bulky, or 2 strands of worsted weight)? And then, what crochet language is it in? I can't tell you the amount of times patterns are abandoned and disparaged because someone used their US terminology to try and make a UK terminology pattern. If it's not listed on the pattern or the pattern hosting site(Jen writes in US terms), then you may have to do a little sleuthing- if they're based in the US or Canada, it's most likely US terms, if it's UK or Australia, then it's usually UK terms. But don't assume. You can also determine the terminology by looking at stitch definitions. 

So, while we're looking at the beginning of the pattern, you should read through all abbreviations, and a special stitch section(if there is one). If you know how to do everything on the list in a competent manner, then you can start working on the pattern. If there's something that appears difficult, you should go find a tutorial of your choosing(in the same terminology!) and review the methodology before you begin. 

Designers use different abbreviations by their own preferences, and the language is always evolving. 20 years ago, a MC meant "Main Color". Nowadays, it usually means magic circle (I've got a picture tutorial here). 

Jen's definitions are as follows:
Abbreviations Used:
st or sts - stitch or stitches
ch - chain stitch
dc - double crochet
fpdc - front post double crochet
bpdc - back post double crochet
sl st - slip stitch
rnd(s) - round(s)
sp - space
ea - each
beg - beginning
prev - previous
YO - Yarn Over

Pretty basic, right? The only ones that might be difficult are the front and back post dcs, so then we look down a little more and find the special stitch definitions- Jen's an awesome designer, so she provides links to tutorials:
Special Stitches Definitions:
Front Post Double Crochet (fpdc): Working from the front, YO and insert the hook from right to left
under the post of the double crochet indicated from the previous round. YO and complete the stitch as a
double crochet.
Back Post Double Crochet (bpdc): Working from the back, YO and insert the hook from right to left
over the post of the double crochet indicated from the previous round. YO and complete the stitch as a
double crochet.
FPDC and BPDC Video: You can find a great video for learning fpdc and bpdc here: http://
www.youtube.com/watch?v=m5hN9hNHG_U&feature=player_embedded#
Magic Ring: You can find directions for the “magic ring” here: http://www.youtube.com/watch?
v=FHYVutk2iYY. You do not have to use this method; alternate directions are also given.
Invisible Join: http://www.youtube.com/watch?v=bsHggQGFq3A

So we've read all definitions, we know the stitches, now to start. Since we're making slippers for an adult, there are large size charts included in the pattern. I won't copy/paste those charts, but they're not hard to read. For our purposes, I'll be making a woman's wide width, size 8.5 (US sizes). So I'll find it on the woman's size chart and know that the slipper measurement from heel to ankle is 7 inches for all widths. Then I'll chose my width using the following directions:

How to choose the width:
Three different widths are given for this pattern. Most sizes will fit into regular width because
there is a lot of stretch to these slippers. However, directions for “wide” width are given, as well
as extra-wide. Men with larger shoe sizes should use the wide width. Only extremely wide
widths (EE or wider, up to EEEE) should use the extra-wide width, it is very large!
Select width and go to that section, after rnd 5, all sizes will continue on to Part 2.
Regular width: 10-11” circumference, start on page 4.
Wide width: 11-12” circumference, start on page 5.
Extra-wide width: 12-13” circumference, start on page 6.
*Note: circumference of slipper is measured on the outside, inside measurement is much smaller.

So I'll then scroll down to page 5. As I start reading, I see:
Select a size from either the first or second column of the chart (menʼs or womenʼs), this
will tell you which measurement to use from the third column after rnd 5.
Note: ʻch 2ʼ is counted in stitch count until otherwise noted. When pattern says “dc in
very next available st”, make the dc in the top of the same post that was just used for
the fpdc.
Remember, I'm making an 8.5, so I know the measurement to use is 7".

So I've got my K hook, and my 2 strands of teal worsted weight yarn.
Now, we go back to our basic order of operations. Much like math class, you do things in order. Having completed round one, I've got 12 DCs in a circle, and am ready for round 2:

Rnd 2: ch 2, [fpdc around st directly below, dc in very next available st] to end of rnd,
beg ʻch 2ʼ counts as last dc, join with sl st in top of ʻch 2ʼ. (24)

So I chain 2. Now there are brackets. The brackets tell me I should complete every instruction inside of them before trying anything else. These brackets can be interchangeable with parenthesis ( ) as well, depending on designer. So it's telling me to FPDC, then DC in the top of it, to the end of round. Going back to our lesson on making things in the round, we're putting 2 stitches into 1, 12 times. 12 x 2 is 24. So before moving onto round 3, we're going to count them. With this particular pattern, we're going to have 12 ridges, and 12 "valleys" alternating. If you've got 2 ridges side by side with no vally between them, then you need to redo round 2.

WHEN IN DOUBT, COUNT IT OUT!
Although not every designer puts a stitch count at the end of their rows/rounds, while you're learning, it's always better to do the math yourself if not provided and COUNT EACH STITCH on EVERY ROW/ROUND. This prevents the dreaded ripping out(frog- rip it, rip it) to the beginning of the pattern. 

So we've got round 2 complete, and there are 24 stitches(12 valleys and 12 ridges). Time for round 3:

Rnd 3: ch 2, [fpdc around next 3 sts, dc in very next available st] to end of rnd, last st
will be around ʻch 2 from prev rnd, beg ʻch 2ʼ counts as last dc, join with sl st in top of ʻch
2ʼ. (32)

And, repeat. Ch 2. Do the brackets. Read the entire line of instructions before beginning the round, and count your stitches. The pattern has changed now, so it'll be 3 ridges, and a valley. 24 ridges, 8 valleys= 32 stitches.

Now we get a gauge check:
Gauge check: Diameter of circle should measure approximately 3.75 to 4.25” here.

So we pull out our handy dandy measuring device and lay it across the entire circle. Center it, and see if you hit gauge. If you didn't, you need to fix it. Frog it all and start over- change one thing: hook size, or tension. Some designers like you to swatch it out before beginning, then make sure you keep your tension exact as you work, while some build it into the pattern like Jen has.

And hey, you're doing it- you're reading the pattern! Now keep going. With our slippers, we're going to work round 4 once, and move on to 5. After you finish your first rnd 5, it says:

Repeat rnd 5 until length reaches measurement in 3rd column of either menʼs or
womenʼs chart. Continue on to part 2.
Notes on final length of slipper: The total FINAL length should be either the same as
the measurement of the foot, or smaller. These slippers will stretch a LOT once they
are worn, do not make them longer than the actual foot measurement or they will end
up too big!

Remember that 7" from earlier? This is where it comes into play. I'm going to repeat rnd 5 until I can measure 7" from the start to the row I just worked. Your slipper is now vaguely torpedo shaped ;)

So now we continue on to part 2, or page 7 if you printed:
PART 2: (ALL SIZES)

Hey, there's something bold- better read it!
Note: This next section is now worked in ROWS instead of RNDS. When pattern says
“dc in very next available st”, make the dc in the top of the same post that was just used
for the fpdc. Use the number color-coded for the size you are making.

This means that instead of crocheting the entire way around, we'll stop at a certain place and turn our work. I'm doing a wide width, remember, so I'm using the pink color coding. It's not going to show up on this blog, that's why you went and got the pattern yourself ;)

Row 1: ch 2, dc in same st as ch 2, fpdc around next (22, 26, 30) post sts from prev
rnd, dc in very next available st, leave remaining 6 fpdc unworked. (22, 26, 30 fpdc plus
the ch 2 and 2 dc)

So with Jen's pattern, the parenthesis means it's a stitch count- and they're color coded for easy use, I'm using pink, which is 26. If you're doing a regular width, you'd use the yellow 22, and for an extra wide, the blue 30. So as we work the row, you follow the instruction and repeat as many times as it says in the parenthesis. So a ch 2, dc in same stitch, then 26 FPDCs, and a final dc for a total of 29 stitches.

At this point, you can complete the pattern. Just take it slow and follow the instructions as presented. I hope this helps you gain the confidence and knowledge that you can read a written pattern, and don't hesitate to ask if you need a little clarification. You can do it. Takes practice, just like all other aspects of crochet ;)

You can doooo eeeeetttttttt! :D


Tuesday, January 7, 2014

A New Year, A New Look

Well, I've given the blog a facelift, hopefully that'll resolve the complaints about not being able to read the white text on the purple background with a non-average font :)

Coming soon:

How to read a print pattern!

C2C- Corner to corner topics including
                    Color Changes
                    Increasing/Decreasing
                    Making it a rectangle and how to measure

A monthly pattern roundup on a variety of topics- I think keeping warm this january would be nice ;) I'll try to make it ones I've actually made, but there's only so much time in a day and I'm getting orders too. If you're a designer and would like me to consider your paid pattern, I've got to at least proof read it.

That should keep me busy through mid-February, so we'll revisit the topics list in a couple weeks and see what else needs kept up. I'm working on a very large special order, and that's gonna take priority for the time being :)

Happy Hookin'!
(I'm going to start "signing" my posts with a picture of my current WIP)


Thursday, January 2, 2014

Technical Thursday: Hooking with ruffle yarn(a one skein scarf tutorial)

Welcome to 2014!

I lurk on quite a few different crochet oriented pages/groups on facebook to get ideas for technical thursdays, and one of the things I've been seeing pop up a lot is "How do I work with ruffle/sashay/starbella/this weird yarn?"

Now, I own a single pair of knitting needles, but I am a hooker at heart ;) So I use a crochet method to make my ruffle scarves :)


So this week I'll be talking about options for ruffle yarn, how to use it properly, and helpful hints.

First things first- what are you going to use it for? You can make a scarf, or add ruffles to a skirt, or even the cuffs of a long sweater. Or you can use it as a plain, slightly flat super chunky weight yarn to make just about anything. For our purposes, we're going to say that we didn't spend $5 on 30 yards of super bulky yarn and are going to use it for ruffles.

One of the main problems people have with ruffle yarn is using it as intended, spreading it out into it's ruffle form as they work. It takes a very coordinated hand to hold, feed and spread at the same time. There is a very easy solution for this problem, but it does add to your time totals- a toilet paper roll :) Simply take 15 minutes and gently flatten it out as you roll it onto the tube and then you're ready to go :)


I've rerolled my yarn and am ready to work with it now ;)


Yes, the pictures are out of order. But now that we're ready to work, which side do we use? Hmm, maybe that side with the thick edge and sparkles wove in! Nope. Actually, we work in the second row of loops from the top, opposite the sparkly edge. 

How to make a 1 skein ruffle scarf using a crochet hook


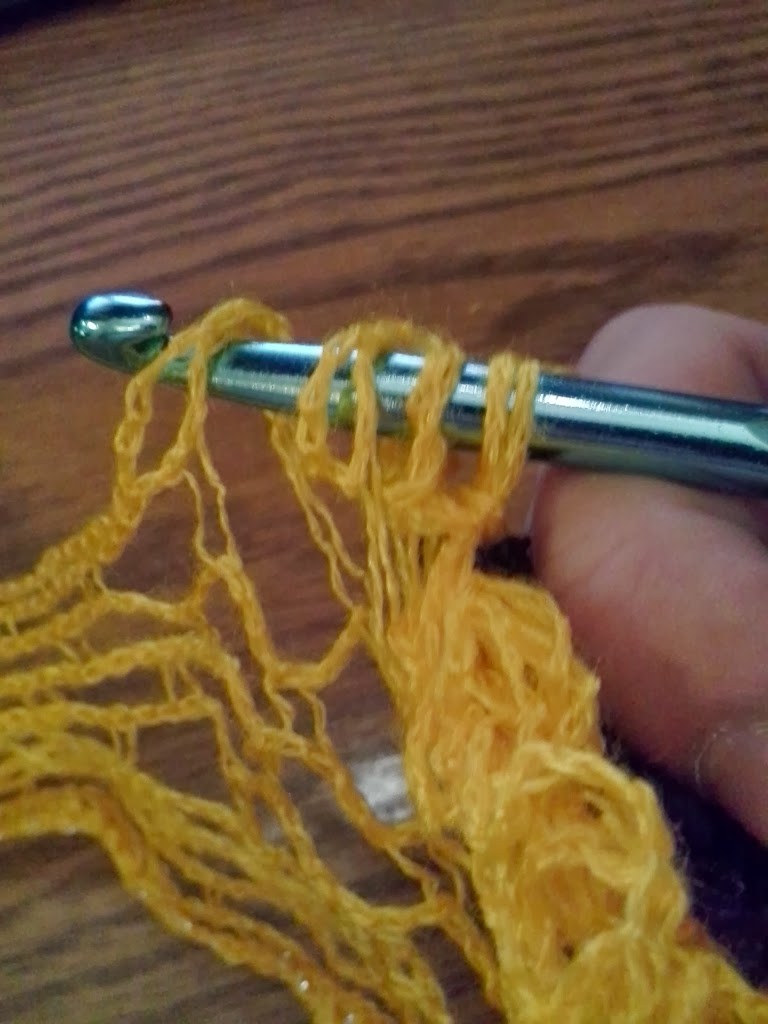
 So now I'm stretching it out a little bit- I want to start my stitches in the 2nd row, the second "hole" that is not cut open.


 Now I insert my hook from front to back, and yarn over by drawing the top edge around the back of my hook which I immediately stick into the next "hole" and create a working loop by slip stitching.
 Next, pick a magic number- the higher the number(I'd recommend between 6 and 10), the tighter your ruffles will be. I use 8 or 10. By sticking your hook in every other "hole" on the 2nd row, you want to get your magic number of loops on your hook.
Once you've got the desired number of loops on the hook, stick your hook in the next "hole" and perform a slip stitch. 
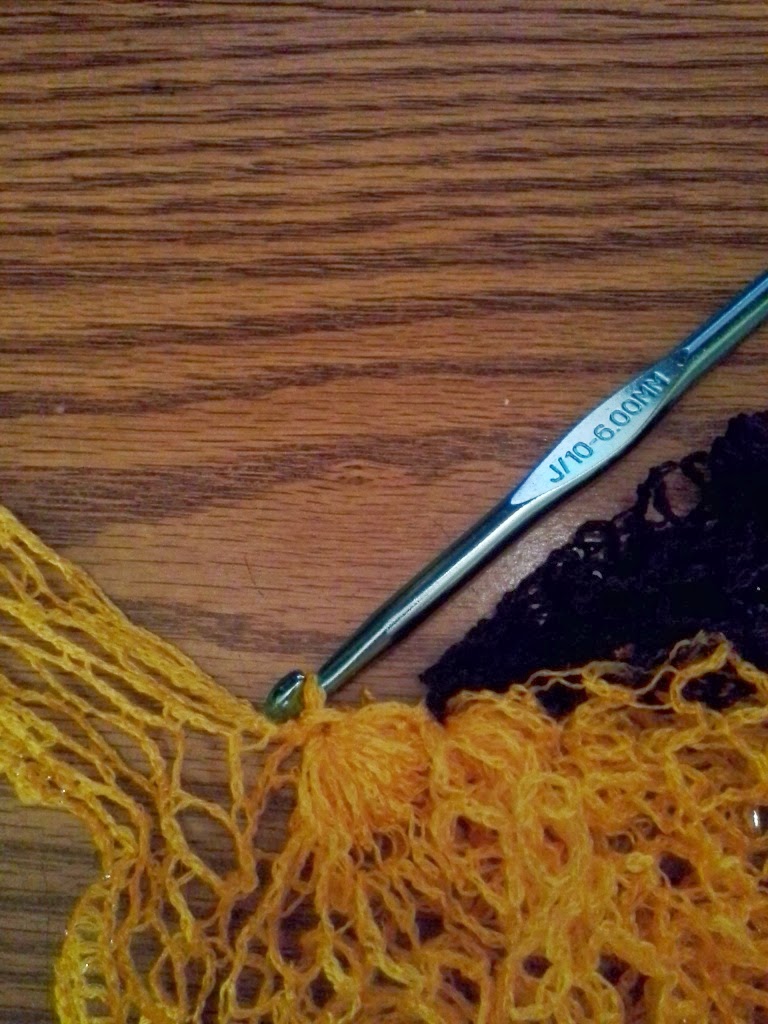
Then start over, doing a slip stitch every 8-10 loops on the hook. Continue this until you run out of yarn- 1 skein makes 1 perfect sized scarf for most purposes. When you get to the end of the skein, simply leave the last 5 or so "holes" unworked and pull the loop left on your hook as wide as you can and slip your end into it, and pull it tight. Some people add liquid stitch to make sure it holds, some use a bit of thread or coordinating yarn and hem the end, some just leave it as it is.


Got a knot? Gently untie it if you can, and do a slip stitch to hold both ends together as you continue to work on the scarf. Or, if you're so inclined, you can leave it knotted and work over it, it'll disappear into the ruffles(usually- there's always the wicked knot/ball determined to prove me wrong, but on a general basis, it works).

Thursday, December 26, 2013

Technical Thursday: Toilet paper tube Pom Poms

And I figured today would be a great time for the years first(and last) Technical Thursday :D As we prepared for the holidays, I saw a lot of random pictures and tutorials that I'll never see again, or be able to credit, but the one that stuck with me was a picture of someone making a pom pom with toilet paper rolls. A couple dozen of which I currently have stashed for future kid projects. So as I was finishing my father in law's present(did I mention I got married 2 months ago?) I grabbed my cell phone and started snapping pictures. Again, some day I will own my very own Canon Rebel camera and assorted lenses, but until then, we're stuck with what we've got available, lol. 

So this is how I made the pom pom. 

You need yarn, 2 toilet paper rolls, and scissors. Liquid stitch is optional, I just like to soak the center of my pom poms in hopes that they won't fall apart as easily as they normally do. It's just their nature to fall apart. 


1. Cut 2 12-16" lengths of whatever color you want your ties to be. 

2. Hold the tails of your yarn and begin winding around both tubes

3. Overlap on your tails a bit so you don't have keep your finger holding them down

4. Keep wrapping- the thicker the wrap, the fluffier the pompom. 

5. Once you've reached your desired thickness, work one of your tail lengths of yarn UNDER all the wrapped yarn(I used a crochet hook) 


6. Center the tail and TIE TIGHTLY. Then work the yarn underneath again and TIE IT AGAIN. 

7. Flip it over, and repeat step 6. 

 8. Now slide the tubes most of the way out, and tie the two tails together. Gently remove the tubes and tie the centers together carefully and repeatedly. I tied them together, then wound the tails around again and tied twice more. Bulky knots will not be visible once you fluff, just take care to leave enough tail to attach to what you are working on. 


9. Optional: Coat your center ties and knots with liquid stitch for durability. 

10. Gently insert your scissors and begin cutting the loops. Take care to avoid cutting your tails, but do snip your working yarn off. 

11. Repeat on the other side. Fluff and let dry. 


12. Attach to your project and enjoy. 


Before I saw the picture that sparked this idea, I was using a double wide DVD case and doing essentially the same thing. I find that the toilet paper tubes are a little more forgiving and easier to work with because I wasn't worried about scraping the cover ;) 

Tuesday, November 26, 2013

Technical Tuesday will be on Thursdays ;)

So I'm quite busy these days, who says stay at home moms do nothing? I co-lead our daughter's GS troop, deal with ADHD/mood disorder in our 4 year old, cook, clean and crochet.

We had a really hard month in October, with 2 ER visits, a 3 day hospital stay, a postponed wedding, a cancelled reception, mandatory time off, a wedding, a broken van, a truck that needed extra repairs to pass inspection and more.

I also created a logo for fun, it's simple and stylistic, but I like it:


I also had my first REAL order from a non-family member! I put it in the mail yesterday and am hoping she likes it ;) A school chum, but still she purchased 2 hats and a headband(and got one free since I didn't particularly care for the way the one she ordered turned out). 


I worked up the headband on my own taking pieces of other free patterns I found on the web after the original pattern turned out being completely incomprehensible to me. It was a combination of UK terminology and implied rows that weren't written out.

So needless to say, I won't be posting this week. Or maybe I will. But it'll be Thanksgiving and I am hosting, so I just might not get around to it.


Thursday, September 5, 2013

Busy busy busy!

I feel the need to apologize. I do end up letting the blog slide when I get busy with the kids and their activities. I've had a crazy day today, even, but have great news! My baby will be starting Head Start this next monday, so I'll have 20 free hours a week to actually crochet and work on the blog ;) It's a bittersweet event, and it'll probably take me a few weeks to scrape all the accumulated toddler contamination off of everything, LOL. I'm still testing for Crafting Friends and Crochet by Jennifer, though I haven't had time to work on swaps, I suppose I'll have more time soon to do that too. I'm a Brownie girl-scout leader as well- just a crazy crocheting housewife :D I've been crocheting a lot, so I'll add pictures that I can find of stuff too. Sorry for the picture dump!


Sunday, January 6, 2013

2013

I think I'm sufficiently recovered from the flood of holidays and birthdays that come our way during the last 6 weeks of the year. (3 holidays and 4, yes, 4! birthdays in our family between mid November and the end of the year).

So I'll be back soon. I've been cheating on my hooks, and doing other crafty things. I'm currently waiting on a big box o' fun (fur!) from Herrschner's, and I'll be working on some fun stuff when that arrives. It's complicated, but a short version could be that serendipity decided to intervene after my mother in law played with my daughter's Furby all of Christmas Day, and I was gifted a free pattern to match, and she's been known to complain about my crocheting, so guess what she's getting for her birthday in a couple weeks? *Insert evil gigglesnort here* I think I'll make her a hat and put the actual creature in the hat so it's doubly crazy.

I've been spending a lot of time down at the bus stop, and I'm thinking I need a big ole cowl that I can wear as a hood AND twist over my face for a ski mask or veil effect. I also need to make my son the tow truck hat (cough*mater* cough cough) because he now accompanies us seeing as Daddy finally found another job and has started back on the road. Not so good for my Valentine's day options, but way healthier on the budget and definitely a winner in the "OMG Get out of my house for 20 freaking minutes!" department(I love him. But we've literally been at each other's side for two months. Even retirees go play golf for 4+ hours at a time!) Alrighty, that seems like enough of a welcome back ramble.

Keep on Hookin'!  Happy 2013~