Pop culture patterns and more

Thursday, March 20, 2014

Technical Thursday: A look at yarns (And some BIG news)

Hello Hookers!

Again, it's been a crazy busy week by the creekside. The oil pan in our vehicle rusted through, my camera arrived, the weather's warmed up to a bearable level, my husband's work schedule changed significantly, my designers have started putting out pattern tests again, I got a bike, my old computer died and took all my stock with it(I might of mentioned that last week lol) and probably the most important thing- WE CHANGED OUR NAME!

For now, I'll keep this blog up and running with my technical thursday stuff, but I'm going to slowly start reformatting and we'll eventually be moving to a blog under our new name, which is Mutant Daisy Creations.
Like us on Facebook HERE

We changed our name for a couple of reasons including the fact that there is another creekside crochet out there, recently started, with a name in front of it. We don't want any confusion between the two because the other one seems to be run by a foreigner who sells things that are not made to my standards and frankly, I don't want any type of association with them. Also, I'm adding amateur photography and other crafts to our repertoire.

We went with the name Mutant Daisy Creations because it's more all-encompassing, quirky, and fun, and there is NOT another crocheter/crafter with the name ;) Plus, there's this:

I had purchased a gerbera daisy at the grocery store the other day to play with my camera. It seemed like providence that when I moved aside the biggest, most dominant bloom, I found this adorable bloom underneath. 

So now, we're going to talk about yarn ;)

Yarn- The thin strands of fiber twisted together to form a workable material. Yarn can be made of just about anything, more on that below


TYPES AND COMPOSITIONS:


  • Wool - Outside the US, wool is what they call yarn, regardless of composition. In the US, wool usually refers to a yarn made of wool. 100% wool will felt when machine washed, or even washed roughly by hand. If you want a non-feltable wool yarn to work with, look for the word superwash on the label, this usually(NOT ALWAYS) means that it will not felt. 

  • Acrylic - This is a very popular type of yarn, and what you can find on shelves all over the USA. Red Heart Super Saver and most Red Heart basic brands are 100% acrylic, but as always, check the label. This petroleum based fiber holds colors very nicely and therefore has the largest color selections. Also, I've never heard of a single person having an allergic reaction to acrylic yarn- the dyes, yes, but the yarn itself, no. 
  • Reflective- This is a new and quite popular type of yarn. Red Heart Reflective is the main one I've had access to, but there are several other companies that have jumped on the reflective bandwagon. This is usually an acrylic based yarn that has a single strand of a very light reflective fiber in it. It looks like normal yarn(and the RH is suprisingly warm, I used it for an earwarmer and have no complaints) in regular light, but add a flash to your camera and that strand lights up like fiberoptics. It's pretty neat.
  • Frill Yarn- aka Sashay, Starbella, Ruffle- This is a super bulky type of yarn that looks like a ribbon while on the skein, but you fluff it and it becomes a light and airy lace type that makes some excellent additions to hems or the pretty ruffle scarfs that are everywhere these days. The regular size is about 3-4 inches when fluffed, and there's a new mini frill yarn that a couple of companies have recently started manufacturing that only goes to about 2 inches when fluffed. 
  • Cotton yarn- this yarn is made of 100% cotton fibers. It's excellent for kitchen hotpads(use a small hook and stitch, or you'll be burned every time) because it has a higher heat threshold than acrylic and won't melt. It will burn if exposed to flame, but it doesn't melt like acrylic can if you're taking a hot pan out of the oven. 
  • Animal Fibers - there are a thousand different variations of yarn out there, blends, etc. There's angora yarn, alpaca yarn, and more, and any blend of these can be spun together and make a workable yarn. Natural fibers from animals can be hard if not impossible to dye, so these are the types of yarns that are all shades of brown, white and golden colors found on the animals. Some will felt, some will not. There's way to many to list here, so all I can say is do your research.
  •  Manufactured fibers - the most used types of man made fibers are nylon and polyester, and there's also some elastic blends that are used for certain types of projects. 
  • Plarn - sound like some sort of ooze, doesn't it? It's not. It's actually plastic yarn shortened to plarn. You can make it by very carefully and uniformly cutting up your old grocery store bags into long strips and using it like a bulky or super bulky yarn. It's extremely water repellent and makes great mats or beach bags, I've even heard of a small movement where they use plarn to crochet sleeping mats for homeless people. 
  • Tarn - Same deal as plarn, except it's made with old t-shirts cut up and allowed to curl into a very soft and thick yarn as you make. There are a variety of tutorials out there but I haven't the time or the willingness to do that myself right now. 

YARN SIZES:

There are two types of sizing. There's regular yarn, which, the larger the number, the bigger the yarn, it's done by weight and wraps per inch. To test an unlabeled yarn size, you get a ruler and wrap yarn around it without pulling it too taunt or leaving it too loose. I'll do another post eventually on testing yarn composition and determining size. Today we're speaking in general. 
Then there is the thread, where the the larger the number, the smaller the yarn. Thread is usually not referred to as yarn, but tecnically, it is. 

Regular Yarn sizing:

There is a little icon on almost all yarn sold in the US. It looks like this:

This picture is from the skein of RH reflective shown above ;) 

  • 0 - Lace 
  • 1 - Super Fine 
  • 2 - Fine
  • 3 - Light
  • 4 - Medium
  • 5 - Bulky
  • 6 - Super Bulky


These yarns also have other names, like fingering, sport, baby, worsted, DK, Aran, Chunky, Roving to name a few. However, the general names are NOT HELD TO A STANDARD. Therefore, someone could say they need a worsted yarn and mean either a 3 or a 4. To me, baby yarn and sport weight are the same, but according to others, baby yarn is a size 2, and sport is a size 3. So it's better to use the names as listed on the icon, especially if you're a pattern designer.

Thread sizing:

Thread sizing is a bit easier, and there's no handy icon. The label will simply say "Size 10" and whatever type of thread it is- it commonly appears in nylon, polyester, mercerized(shiny) cotton and regular cotton. Size 3(I've never seen a size 1, that doesn't mean it doesn't exist, somewhere, but in the USA it starts with 3 as far as I know) is the largest. Size 10 is the most common size. Size 20 is even thinner, and size 30 basically looks like sewing thread to me. I usually like to stick with size 3 for items like purses or crocheting with soda tabs, and size 10 for my thread doilies. Of course, I'll make a doily in medium yarn as well, because that's what my grandma did after she couldn't see the thread anymore ;) In fact, I'll share a throw back Thursday picture right here 
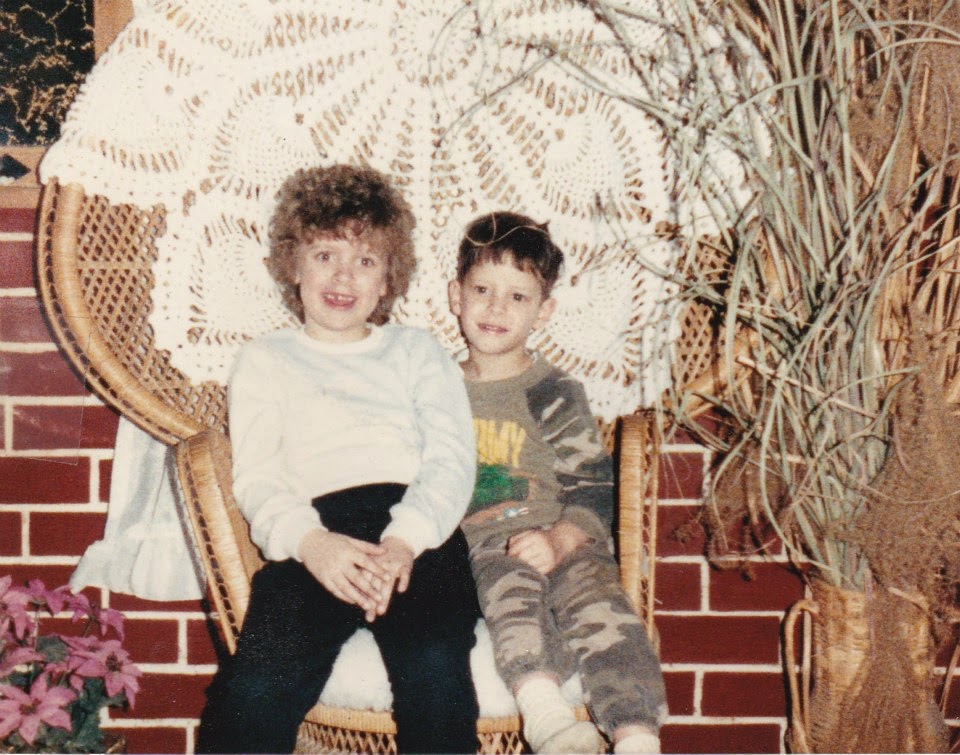
Just look at that huge and gorgeous doily!  This was taken, oh, about 25 years ago. (And boy, my son really does look like me lol) Please forgive me the perm. I had to listen to my mama too, just like everyone else. 

COLORWAYS:

  • Solids - The yarn is all one color throughout
  • Varigated - The yarn is several colors, dyed in short sections that don't always line up well.
  • Self-striping - The yarn is dyed in a few colors, in large increments that create a gentle flow of colors
  • Art yarn - The yarn in this category usually is handmade or has an odd color pattern that doesn't fit into other categories. Some of LB's Homespun has this weird effect, it's a combination of a solid and a self striping that goes into darker shades of the same color and back again. 
An important note on DYE LOTS. Some yarns have DYE LOTS. That means that all the yarn with the same lot was dyed in the same batch of dye and will match each other exactly. Always buy enough of the same dye lot to complete a project or be prepared because the blue on dye lot 123 will not match the dye lot on 184, even if they look the same. Some yarns don't need dye lots because the manufacturers have perfected the recipe of dye they use to color. Red Heart Super Saver no longer has dye lots, but if you find some antique yarn, you'll see that they used to as well. 


So anyways, there's some more information on yarns for you to peruse. Enjoy and be Happy, Hookers! 

Thursday, March 13, 2014

Technical Thursday: 3 quick sizing reference links

Ack! Sorry, I'm late, I'm late! For a very important date(with my bathtub and a new bottle of bubble bath, lol)

So yesterday, my computer died a painful death by Vulcan. *Insert geeky fist pump here* Just as the storm rolled in I realized I would not be able to rescue it, or my pictures I had saved for future tuts. Not right now anyways.

And today, I got the best package EVER in the mail.

So I gave the point and shoot to the girl child- it made her extremely happy

And then I was blinded by the snow glare. But it's supposed to be 50 here tommorrow and hopefully it'll go away. I'm working on a shawl with some unforgettable I picked up during the last work run. I tried to put my new microwave stand together only to realize one of the panels has a gouge in it, so I've got to wait for a replacement.  I've sold a bunch of stuff this week too, so needless to say, it's been crazy busy week, and especially day, here at Creekside.


So here's a few links to some of my favorite sizing charts. 

Almost everyone has been to Bev's- a quick link is HERE

Going to do the measuring yourself? HERE is a how-to measure guide 

HERE is a handy guide on sizing blankets


Okay hookers, that's about it today, very short and sweet. I don't want to lose my bubbles, and since I am starting from scratch, I just wanted to give ya'll something useful in the meantime. ;) 

Happy Hookin ya'll! 

Thursday, March 6, 2014

Technical Thursday: Making Amigurumi

Hello Hookers!

Today I thought I'd go over some tips when making an amigurumi.

Amigurumi: the Japanese art of crocheting or knitting plushies/stuffed animals/dolls.

This is the current way we refer to plush creature making, you'll also occasionally hear ami, plushie, stuffie, stuffed animal, etc. This post has some helpful hints and tips.

Making the Ami

There are two truly basic components to making amis- the mastery of the magic circle and an ability to work in spirals. For a how to on the magic circle, you can search out a tutorial or check out mine here. 
Working in spirals can seem intimidating, but it's the same as working a circle with the exception of the join. There isn't one. 

USE A STITCH MARKER. This is important so you know when to stop counting a row and start on the next one. You can use a conventional marker, or even a scrap of yarn works nicely too, especially if you just weave it in and out on the next row- then when you're done, a simple tug and it comes out cleanly. Use more than one or the yarn so you can leave it in place for a few rounds, just in case you need to go back and redo a few rows. 

READ THE ENTIRE PATTERN BEFORE BEGINNING! Pay special attention to the finishing section- sometimes you can save yourself a lot of frustration and counting if you see a note along the lines of "On the head, place one eye in a spot here, and then count over 9 spots and place the second eye. A little forethought and you can pop a scrap of yarn in the stitch as you make it and not need to count when you're ready to put the head together.

USE PROPER HOOK SIZE! As a general rule, you want to go 2 sizes smaller than the recommended hook size- so for a worsted weight(4) yarn, I've found a F hook works best. This makes the fabric you produce thicker and sturdier. You can use any size of yarn/thread to successfully make amis, but you have to use the proper hook for that size to get good results.

DON'T BE CHEAP! Use a decent quality yarn and other materials. The difference shows. Red Heart Super Saver is GREAT for amis, providing both a large selection of colors and durability. I've used Caron simply soft as well, and while it provides a nice sheen to the finished project, it's a pain in the rear to work with a smaller hook. I DO NOT RECOMMEND USING A FUN FUR TYPE YARN UNTIL YOU ARE SERIOUSLY EXPERIENCED AT MAKING AMIS. 

USE THE EXTRAS! Do purchase SAFETY EYES. Buttons are a choking hazard and even if it's intended for an adult, there are often children/grandchildren that are indulged when they want to play. Lacking that, embroider them on. Use a little liquid stitch(On a side note, do NOT buy the bottle of LS with a twist top, get the tube- the bottle leaks and dries out) when weaving in your ends. A METAL sewing needle is a must, the blue plastic ones bend and break. I've actually managed to snap off the ends of a couple of metal ones while sewing an ami. Find a local source of cheap nylon stockings, like the $0.33 cent knee highs that come in little plastic capsules in my local wal-mart hoisery department. Use them to line the ami before stuffing to stop the fiberfil from working it's way back out. Use new fiberfil if you can, it's fine to recycle old pillows/animals, but at the same time, there are dust mites and dead skin cells that work their way into the fluff over time. Purchase some POLY PELLETS if you're making something that needs a little weight. You can create an easy weight sack by pouring some into the leftover parts of your nylons and tying a knot in it(and a little bit of liquid stitch around the knot for security purposes)

KNOW YOUR STITCHES! Again, you should know all the stitches used in the pattern. Most amis are worked in single crochet(sc) and have increases (2sc in next stitch) and decreases(pull up a loop in the next stitch, yarn over, pull up a loop in the next stitch, yarn over, pull through all 3 loops on hook). Some will use taller stitches for texture or shaping. 

PRACTICE! Make some hacky sacks first. They are small balls that are filled with beans/pellets and will help you understand the concepts and get used to decreasing while working with a stuffed item.

SEW ON BEFORE CLOSING! With the exception of things like arms and legs, or something that needs to be added after stuffing for proper positioning, you should add other things before you stuff. I sewed the eyes on my zombie lab dudes and embroidered the mouth once I was about 6 rows past where I wanted them so they'd be firmly in place when I stuffed. This allowed me to work both sides of the fabric and ensure a close fit, as well as stopping me from stretching out the fabric more than I should or ending up with a large loop of sewing thread knotted and messy and requiring me to pull the whole thing off and try again. 

BE AWARE OF THE NATURE OF SPIRALS! When doing color changes in a proper spiral, there will be uneven edges. I covered the zig zag of my lab dudes eye strap by sewing the eye over the join. For his pants, and needing a flat join, I had to slip stitch and tie off, then start a new row, and it's still noticable, just not as much. I covered the join with the overall flap. 

SMALL HOOKS AND SMALL STITCHES CAN HURT! Amis require an even, tight tension. This can and will irritate your wrist/hand/fingers. Take frequent breaks, just be sure to mark where you stopped on the pattern and try to stop at the end of a round. 

HAIR IS A PAIN! There's nothing more time consuming than adding hair to an ami. There will be gaps, and bumps if you add it "latch hook" style by pulling up a loop and then pulling both ends through the loop. It's completely do-able, but very time consuming. 


Amis are fun and wonderful keepsakes for people. You can do it, just don't expect perfection right from the start- it's a rare occurence. I think I've gotten it all covered in a basic manner, but if I've forgotten something, let me know and I'll add it :) 

Stay Happy, my hooker friends. 


P.S- I'm anxiously awaiting my "Yarn Whisperer" hoodie in the mail ;) I also paint occasionally, and got permission from the Ninja Hooker designer to use the ninja. She's so cute! 


Thursday, February 27, 2014

Technical Thursday: Awesome Cat Sack Hat FREE pattern!

Everything is awesome here at Creekside Crochet this week. So I decided to make up a pattern for my daughter's crazy hat day tommorrow and share it with you all. She loves cats and unicorns and all that stuff(she must get it from her father, I prefer skulls and skeletons hehe)

Now this pattern is ranked just between easy and intermediate- it requires some knowledge of working amigurumi in spirals. As well as front post/back post and working in the round.


The AWESOME Cat Sack Hat

You need the following colors in a worsted weight- I used Red Heart Super Saver
White
Petal pink
Shocking pink
Black
Aruba Sea

J(6mm) Hook
Needle for sewing


HAT:

Round 1:With white, do a chainless HDC Foundation of 64 stitches. 
Round 2: Ch 1, HDC in same stitch(counts as first BPHDC). FPHDC in next, alternate around, join in Ch1(32 FPDC/32 BPHDC)
Round 3: Ch 1, BPHDC around both Ch1 and the first BPHDC of the last round. FPHDC around next front post, BPHDC around next back post. Repeat around, join in ch 1(32 FPHDC/32 BPHDC)
Round 4: Repeat round 3, tie off when finished. 

Round 5: With Petal Pink, join in any stitch and ch 1, HDC in same stitch. HDC around, join in ch 1.
Round 6: Ch 1, HDC in same stitch. HDC around. Join in Ch 1.(64 HDC)
Round 7-19: Repeat Round 6
Round 20: Repeat Round 6, tie off and weave in ends(We'll sew with a doubled string of yarn for strength and tension)

Set Hat Aside


Horn: (Make 1)

We are working in spirals, DO NOT JOIN!
With Aruba Sea and the J hook:
Round 1: Magic Circle, 6 SC in circle. (6)
Round 2: 1 SC in next, 2 SC in next. Repeat 3 times(9)
Round 3-4: SC around.  (9)
Round 5: SC in next 2, 2 SC in next. Repeat 3 times(12)
Round 6-7: SC around. (12) 
Round 8: SC in next 3, 2 SC in next. Repeat 3 times(15)
Round 9-14: SC around (15)
Round 15: SC in next 4, 2 SC in next. Repeat 3 times(18)
Round 16-19: SC around (18)
Slip stitch into next stitch, press flat and slip stitch through 2 layers 4 or 5 times before tying off. 


Ears: (Make 2)

DO NOT JOIN! (This section is hard to write out, so bear with me- I'm going to write it as I did it)
With Shocking Pink and J hook:
CH 6. We will be working BOTH SIDES of the chain, one end has no increases, while the other increases to give us the desired shape. 
Round 1: SC in 2nd ch from hook and in the next 4 stitches. Turn your chain and place a SC directly opposite the last one made to work up the other side of the chain, and in the next 4 ch stitches. 4 SC in the last remaining stitch. (9 SC, 4 in one)
Round 2: 1 sc x 14
Round 3: 1 sc x 11, 2 sc in next 2
Round 4: 1 sc x 17
Round 5: 1 sc x 13, 2 HDC in next 2
Round 6: 1 sc x 19
Round 7: 1 sc x 14, 2 HDC in next 3
Round 8: 1 sc x 22
Round 9 and 10: Repeat Round 8. Sl st in next. Flatten the ear and working through both layers, slip stitch the bottom shut for a few stitches.


Eyes: (Make 2)

We WILL be joining, and turning. Pay attention!

With Black
1: Magic Circle, 6 sc(6) Sl st into 1st stitch to join
2: Ch 1, 2 HDC in each stitch around(12) sl st into 1st HDC to join
3: Ch 1, HDC in next, 2 HDC in next stitch. Repeat 6 times, tie off black, weave in end (18)

With ARUBA SEA
4: Pull up a loop in any stitch and slip stitch into the next 2 stitches. 2 sc in next, sc in 2, 2 sc in next, sc in 2, 2 sc in next, 2 slip stitches. Ch 1 and TURN (14)
5: Sk 1st slip stitch, slip stitch in 2nd stitch and next 2 stitches. 2 sc in next, HDC in next 3, 2 sc in next, sc in next 4, working around both of the last 2 rows(black and aruba slip stitches). Tie off, weave end into same color. (14)

With WHITE
6. With the right side facing you, pull up a loop in the same black stitch you started the Aruba Sea. SC in next 4, 2 Sc in next sc in next 4, 2 sc, sc in next 4, slip stitch into the black on the other side. (18 sc, 1 sl st) TURN
7. Ch 1, skip next sl st, sc in next 3, HDC in next 2, 2 HDC in next stitch, hdc in next 5, 2hdc in next stitch, sc in next 3, sl st. Tie Off, weave in ends

With BLACK:
8. Join in any stitch. SC in next 5, 2 sc in next. Repeat around. Join, leave long tail for sewing.


FINISHING

Use a doubled strand of petal pink(Put it on the needle and tie the ends together, it'll be a big loop) and use that to sew the ears and horn in place. Sew the first ear, then count how many stitches you used to do so and count in from the other side, use a marker. Then center your horn in the space between and sew it in, then sew in the other ear. 

Attach the eyes, and when you reach a good spot for some eyelashes for that girly feel, put them on there. 


Stay Happy, Hookers!

Wednesday, February 19, 2014

Instead of our regularly scheduled program

Please allow me to act all crazy weird. I'm wired. Why?

BECAUSE I DID IT!


I finished this beast of a blanket. 6 weeks and 4857 yards of Homespun. Somewhere around 7 by 9 feet of C2C done in wildfire and pearls
So I'm going to go do a happy dance and allow myself a few days to just wow it. Have a great week! 


Thursday, February 13, 2014

Technical Thursday: Hearts on Parade

Good morning hookers!

I'm making the effort to get back on track this week. We are having a crazy week yet again here at Creekside. The IRS paid our tax return to a state that claimed we owed back child support for a child that was adopted by her stepfather last spring, charging us over a thousand dollars a month for each month AFTER the adoption was completed. (No good deed goes unpunished- it was initiated by the child's mother for legal reasons). So my camera is on hold for now :/

And my hot water pipe is frozen, it's only -13 outside.

So anyways, I'm in the mood for a little something cheery and thought I'd do a free heart pattern roundup. I've made some of these, but not all, and just figured I'd put some together to lift my spirits.


1. My favorite doily- The Hearts Desire Doily- pattern available here by Red Heart/Coats and Clark. I went a little insane last year with them, because they're so quick and easy.

2. My favorite stand alone square, pattern by SmoothFox on Ravelry here
I made this quick little apron for a swap I was in last year. 


3. A most adorable heart rose applique is available here, written by Mia's Heartfelt Hands on ravelry. 

4. Need something quick and easy to make for a child? Try this most cute heart coin purse, pattern by I'm hooked 25 and found on their blog here

5. Coffee cozy with a heart applique? Cute and functional- find it here on the This ninja creates blog. 

6. A heart shaped picture frame? Love it! I had a dreamcatcher in a heavily starched one of these as I was growing up, I LOVED it! Pattern is by Helen Free and available here in both UK and US terms ;) 

7. I can't forget about the Danish Heart that keeps appearing in my newsfeed- it's adorable, and available here, written by the talented Alipyper

8. ADORABLE baby legwarmers(and really, what's cuter than a baby wearing legwarmers?) from Dearest Debi's blog here

9. Sachets never go out of style- There's a quick one at Red Heart here

10. A scarf you say? Okay- how fun is this one? Available here , written by Alice Merlino

11. Need a kid sized bag so they can carry their valentines around? Try this one here , written by Andee Graves and published on Red Heart's website. 

12. And last, but not least, we need a small basket of some sort- so give this Petal to Picot's pattern a try here

An even dozen seems like a good number to me, should keep you busy for at least a little while. 

Love, live and laugh my hooker friends, and have a Happy Valentine's Day :) 

Thursday, February 6, 2014

Technical Thursday: C2C Color changes

Apologies! I'm late, again :/ My mother was in the hospital this week and was diagnosed with COPD, so I was understandably a bit distracted.

Anyways, here it is- my favorite method of color changing while doing c2c. You know how to size and shape it, and how to do increase and decrease stitches.


First up, we've finished color A. There are 2 different types of color change, for increase and deacrease stitches. Remember, I use liquid stitch to help me here, I find it helps me save on yarn to not have to leave 6 to 8 inches to weave in properly and I've yet to have anything I put liquid stitch on pull apart under normal use.

To INCREASE color change: First, take your hook and work it through the last loop made as well as the top loop of the inside of the last dc(the 2nd pull up a loop motion). Note the I already cut color A and pulled it through.
 Now, I'm going to pull up a loop of color B and CHAIN 6 OVER BOTH MY WORKING YARN AND THE TAIL- I generally try for 2 or 3 chain stitches before I run out of tail. I will go back later and apply a bead of liquid stitch to the ends after I'm finished with the entire project(in case of frogging).

Then I stop and weave in the tail of color A and return to the end of the chain. I turn and do my 3dc in the 1st 3 chains, working of the tail of color B as well. Slip stitch over the tail of color A and continue your row. 


To DECREASE color change. Tie off color A, and insert your hook in the space between the chain and first dc(the space where you slip stitch to. Chaining over BOTH the working yarn and your tail, chain 3 of color B then make the rest of your block. 
It can look quite messy(and homespun frays on the ends, so forgive the fluff.

Remember, I'll be coming back when I'm done and using some fabric glue, then trimming the fluff off when I'm done. I'm working a rectangle with a 6/3 color repeat, so when I get to the side I'm increasing, I'll just do a normal increase on one side, and a decrease on the other. This is what the increase looks like.

I'll come back and clean this up, in a month or two, so leave a comment with any questions and I'll try to include them. 8 days until I order my camera, and a learning curve, and I'll be redoing pictures for most everything, but I wanted to get this out there because I know some people have been waiting for it. 

Happy Hooking!